According to Wikipedia, the tradename “Cutless” is a registered trademark owned by Duramax Marine. The name refers to a molded rubber bearing manufactured by Duramax Marine. The tradename “Cutless” is used for these rubber bearings and this name has also, along with its misspelling ‘Cutlass‘, become a generic term for them.
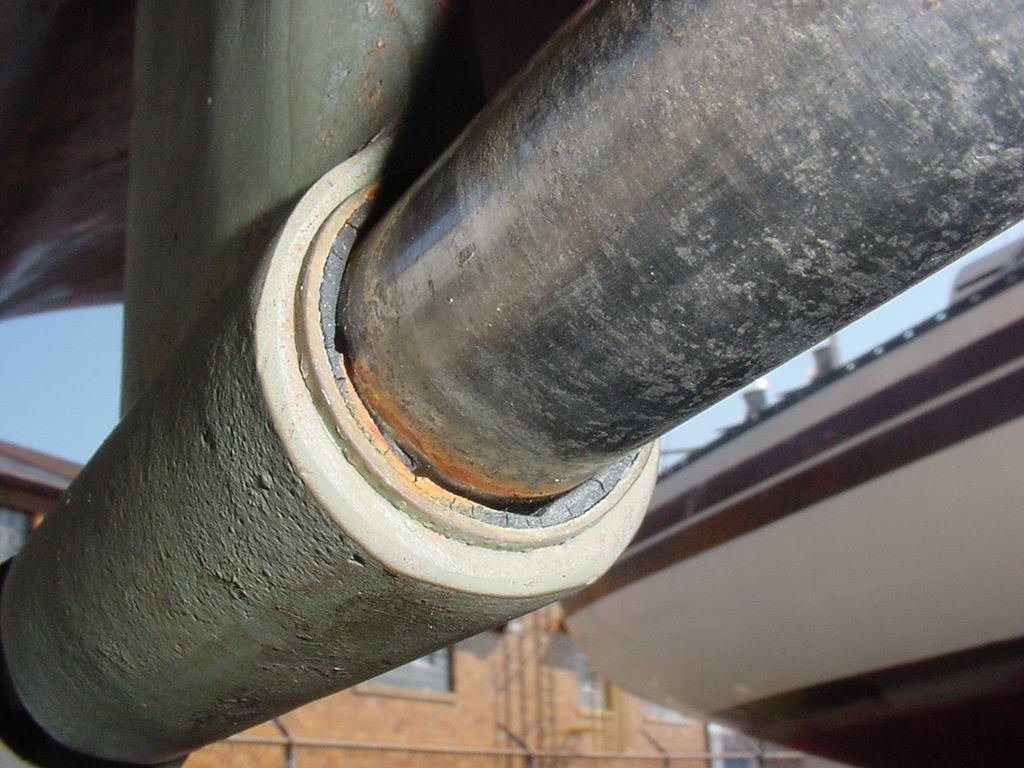
When you see a bearing like this one in the picture, it is time to replace it.
From Richard Britton, Friendly Dragon, 1976 C30 SR, New Westminster, B.C.
The C30 cutlass bearing size is 1 x 1-1/4 x 4. I bought mine a couple of years ago it was a US-made Johnston Duramax, model BACK. Mine was about half the price of the usual marine stores. I assume that you may have read recently about the tricks in separating the coupling between shaft and gearbox, as the shaft must be removed. Once out, check it for straightness or get a shaft shop to do it for you and straighten if needed.
For removal of the old bearing:
1. Use ready-rod or pipe clamps (the clamps that use a 1″ steel pipe to form the backbone of the clamp) to exert pressure in a controlled manner in alignment. Combinations of sockets or large washers or short pieces of pipe need to be used to make contact with the bearing and strut. If you cut off a piece of pipe to suit, and it is not absolutely dead true, the pressure may be at an angle and cause the bearing, socket etc to dig in. Try not to hammer the bearing and strut. Check that the strut is not loose where attached to the hull.
2. If the old bearing will not press out, relieve the tightness by threading a hacksaw blade through the old bearing (teeth forward and down), and hook up the hacksaw underneath it, upside down. You should now be able to carefully cut downwards through the rubber and into the brass/bronze shell of the bearing. Be VERY careful not to cut into the strut itself at either end or damage it in any way or it could start a fracture from that point when under stress.
3. Use sandpaper or emery cloth to remove any irregularities inside the strut. It is particularly important that no burrs etc be at the point where the new bearing will enter.
For installing the new bearing:
4. be vary careful in aligning the bushing for installation and ensure that pressure on the end of the bearing does not distort it.
5. remove any sharp edge around the leading end of the bronze sleeve around the rubber bushing before you press it into place so there is no chance of it binding on entry. It is very tight (usually called an interference fit or friction fit in the trade). Make sure that you lubricate it with something like grease.
6. The new bearing may seem a bit loose, but apparently will “crush” in a bit upon installation making it smaller and tighter on the shaft.
7. You do not need a lubricant between the shaft and rubber bearing; the water will do that.
From: Jim Turner, “Fat Cat” 1986 TRBS, Hull # 4683, Vancouver, WA
You need a sleeve or socket that has just under 1 1/4″ OD to press out the cutlass bearing, and another with a 1 1/2″ ID.
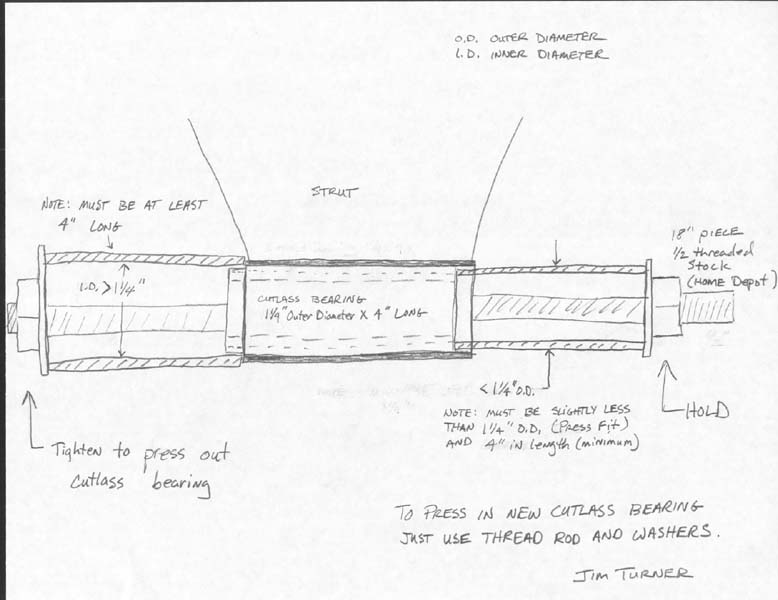
I purchased about an 18″ length of 1/2″ threaded rod stock from Home Depot with nuts and some large washers. To press out the cutlass bearing you use the rod to draw the under 1 1/4″ OD socket/sleeve against the cutlass bearing, pressing the cutlass bearing out through the strut into or through 1 1/2″ OD socket/sleeve which is bearing on the aft surface of the strut. You can also thread a hacksaw blade through the cutlass bearing and carefully cut through it without cutting into the strut.
Pressing the new one in is easier (not easy, easier)… just use the rod and washers. Be careful to keep it centered and aligned to prevent crushing it. Do not use petroleum products to lube the cutlass bearing which can damage the rubber bushing.
See the C34 write-up too!
See www.strutpro.com for a commercial tool you can rent or buy!